The popup ads above are not endorsed by the Pinewood Derby Committee. Please beware of
materials or construction tips that do not meet this District's Inspection rules.
Pinewood Derby Construction Tips
The "BSA Kit" instructions provided in the box are adequate for most
builders. For those creative builders, the District has provided a set of construction limits (see the Official
Pinewood Construction Rules page of this site).
Ultimately, only a hand full of scouts will win a trophy.
Thus, it is suggested that the adult partner spend quality time with assisting the cub scout in creating a unique car
that will proudly display the combined talents of the team. If you happen to win the race, it's a bonus!
Plan at least 3 or 4 sessions over a period of time, well before the Pack race. Many adults choose to divide building
sessions into the different construction categories; Designing, Woodworking & Sanding, Wheels and Axles, Weight Placement,
and Painting. Your Pack Unit may have a construction workshop to help each team get started.
Like many other Cub & Family events, the Pinewood Derby is designed
to facilitate family interaction. Individual talents will exceed in some areas but not in others.
It's teaching a boy how to deal with these "How Do I" situations that is most important, not just winning a race. Please
do not build a car beyond your boy's interest and talent. Proud ownership comes from combined effort, not gifts.
Yes, some parents struggle more than others in motivating their cub scout to get started on their car. Patience
is sometimes the best remedy.
The following construction "Tips" are only suggestions to consider.
Your Pack Unit Derby Committee is looking forward to your team's unique design. Gentlemen... Start Your Engines!
Fast Cars-Thin Shape - An aerodynamic
designed allows less friction. Tests show that thinly shaped Pinewood Derby cars are faster. Although the wedge design is
most common, curved designs can be just as effective.
Weight of Cars - The Pinewood Derby car must no weigh
no more than 5 oz (142 g). Many successful cars come very close to this maximum weight. While a well made "frictionless" car
can sometime outperform a heavier car, the Pinewood Derby car with both these attributes is really fast! However, to avoid
weighing scale discrepancies, shoot for the 4.80 to 4.90 ounce car weight. Lead is the weighting substance of choice because
of its high mass and availability. Shops sell lead as rectangular or triangular plates that can be recessed under the car
(routed out). Lead type tubes can also be inserted in drilled holes. BBs, coins, washer, etc. have been used successfully
in the past. However, do not tape or clue these type of weight to the car.
Weight Placement
- To balance a Pinewood Derby car, many suggest not to add too much weight behind the rear axle. The placement of weights
on a car has always been a big debate. Many recommend placing the weight so that the car will balance approximately 1 inch
forward of the rear axle. To find the balance point, temporarily attach the wheels to the car plus anything else that will
be affixed to the car, tape your weight(s) in place, and balance the car on an edge of your choice. WEIGH YOUR CAR on a calibrated
scale (post office scale, etc.) and keep working with your weights until you reach a weight that is satisfactory. Remember,
don't shoot for exactly 5 oz. It is embarrassing to start carving weight from the car to meet the rules.
 Friction Is the Enemy - Perhaps the most important
step in building a fast car is reducing friction. Any time there are moving parts, there is friction. The axles for Pinewood
Derby cars are nails. The shafts of these nails may look smooth, but they are not! Look at one closely with a magnifying
glass, especially around the head. You will see all kinds of burrs that could cause friction. Below is a list of
helpful hints that may assist you. Remember: ALWAYS WEAR SAFETY GLASSES when using a power tool.
- Polish the axles. First with a 400 grit if you have a really bad spot. Then a
600 grit, and then a jewelers rouge. Finish off with a chrome/metal polish.
- Have only three wheels touching the track. Raise a front one slightly.
There is less friction with 3 wheels rolling than 4.
- The head of the axle should be tapered about 15 degrees so it rubs against
the wheel less.
- Wax the wheels with furniture polish. Make sure the polish does not contain
a solvent of any sort.

|
| Anchor Axle and Sand |
Refining the Wheels - The wheels
of a Pinewood Derby car must remain flat. Smoothing the flat wheels will reduce friction. Below are some hints to consider.
- Debur the wheels. Take off the flashing and seam that was produced
when the wheel was molded with a 600 grit or better sandpaper. Inside as well as out. Sand any bumps off the wheel
the sandpaper. Metal polish will restore the gloss. Be careful lot to break any rules your race has regarding wheel
modification. Narrower wheels have less friction and are better, but are Not Allowed. The tread must remain
95% flat. Do not sand too much or you'll create a flat spot. Caution, electric drill sanding may
damage the plastic wheel.
- Use graphite only. Oil damages the paint and collects dust. I'm told that the graphite works better
than the new white teflon.
- Break in the wheels by spinning them with lots of graphite.
- Put a small drop of white glue where the axle goes into the car body and
put powdered graphite on it there. That causes less friction if the wheel should rub against the car body.
- Other than the good polishing of the axles, dump the axles and wheels in
a ziplock bag with some graphite and shake them for a few days prior to the race. That way the wheel and the axles are
as slick as can be.

|
| Wheel Tread Must Be Flat |
Final Touches
- Sand the car for a smooth surface, and put sanding sealer on the car
to fill in nicks. Finally, test your car at home.
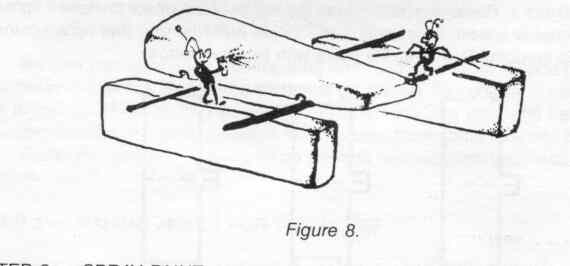
Sanding & Painting

|
| Make a Painting Stand |
Finally! It's Time To Go Straight!
- Put the axle in at a downward (5-10 degrees) angle. This provides two benefits.
The first benefit is that the inside edge of the wheel will only be in contact with the track. This seems to
make the car go straighter with less wobble. The second benefit is that the wheel rides to the outside of the axle and doesn't
come in contact with the body.
- Axles must be in straight front to back. That is square to the body. Don't
trust the slots! If you have one, use a drill press to ensure all axles are straight. One of the front and two of the
back should be measured to be the same height.
- After pressing in the axles, test the car for crooked wheels...roll it on
the floor. If the wheels are on straight, the car should roll 8-10 feet in a fairly straight line. Should the car turn
left or right, you need to tinker with the axle placement without removing them from the car body, until it rolls
straight.
- If you use the supplied axsle grove, do not put the axles in at the top of
the groove. Put them in at the middle. This lifts the car of the track a bit more and reduces the chance of rubbing
on the center strip.
- Glue the axles in place. Nothing is worse than having the wheel fall off
as you cross the finish line.
- Once you match a wheel and axle together with graphite, keep them together.
They wear into each other as a matched set.
|

